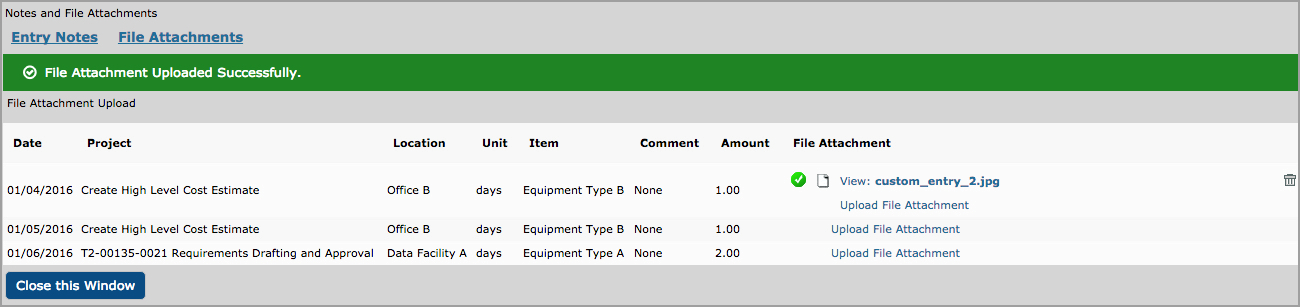
Figure 31.8. File attachments
If your administrator has given you access to upload attachments, you will see gray or yellow triangles in the lower right corner next to the amounts for existing entries. Before you can upload files, you must create some custom entries and save changes. After creating entries, click the gray or yellow triangle next to the amount of the entry for which you want to add an attachment. A gray triangle indicates that the entry does not yet have any notes or attachments. A yellow triangle indicates that an entry has at least one note or attachment. You can hover over the triangle to see what information exists for the entry. Clicking on the triangle will open a pop-up window that shows links for Entry Notes and File Attachments. Click on the File Attachments link, and a list of your current custom entries will be displayed. Find the entry you want to use. Then click the Upload File Attachment link. Click the Choose File button and select the attachment from your local computer files. Then click the Attach File button to complete the process. You can upload multiple attachments per custom entry as long as they each have a different file name. Your administrator may choose to limit the total number of attachments or the type of files allowed. For example, the administrator may only allow PDF files. The administrator may also set a limit on the size of individual files. You can delete an attachment by clicking on the trash can icon next to the file name. When you are finished managing your attachment, click on the Close This Window button.